My lovely Blogger followers!

Showing posts with label Make It Crafty. Show all posts

Monday, 18 February 2013

Fluttering Sapphire Fairy

Happy Monday everyone! I'm here today with a card featuring one of the beautiful fairies ever using those gorgeous Make It Crafty goodies!


She is so dainty that I just wanted to frame her and I thought wood grain would be perfect for it! I coloured her with my Copics and used Stickles Glitter Glue in Star Dust on her wings and on the chipboard butterfly. The sentiment is also from a Make It Crafty sentiment set.  The papers are from the My Minds Eye Miss Caroline collection.

Make It Crafty goodies used:

Copics used:
Hair - E50, E53
Skin - E000, E11, E21
Clothing - R22, R27, R29. G20, G43, G46
Wings: B91, B95, B99

I used the current Sweet Stop Sketch...


Okay, I gotta go now. Thanks for visiting and see you soon with another Make It Crafty inspiration project! TTFN!


Wednesday, 13 February 2013

Steampunk style!

Happy Valentine's Day everyone!  I'm here today with a card that I submitted into last month's Simply Betty challenge over on their FB page...

This is Steampunk Rio and I think she is so cool!  I used Make It Crafty Gears Galore chipboard and My Minds Eye Lost and Found papers.

Okay, I'm off, thanks for visiting.  Have a fab day and I'll be back tomorrow with my Bellarific Friday card!


Friday, 8 February 2013

Make It Crafty Inspiration blog hop!

(Please scroll down for my Chinese New Year blog hop and
the deets to win a fabulous prize!)


It's time for the fortnightly Make It Crafty Inspiration blog hop - and prizesMore about the prizes below, but about the hop - the theme is "Valentines" and each of the team has made a lovey dovey creation for you!  I thought it was a great excuse to use more of the intricate, beautiful chipboard!  So here is my make...


OMG, how soppy is this card?  So unlike my usual style!  I just love the Wings of Love and Nature's Butterflies chipboard.  I also used Echo Park Love Story papers, a woodgrain embossing folder, soft pink chalk ink and a little Stickles Stardust glue on the wings and butterfly. 
 
Okay, back to the hop!  You should have got here from Rhea and you now need to hop off to our lovely Guest Emily.  Here's the full hop list in case you get lost!

Mary J (me!) 
Emily (our lovely Guest!)

Comment a long the way to increase your chances of winning a prize!  There will be 6 hidden prizes across the blog hop each hiding 1 of the new wedding digi stamps and NOT ONLY THAT - fabby Zoe is giving you all 10% off ALL digi stamps valid until Monday 11th.  Just use the code VAL10.

Thanks for visiting and I'll see you later with my Bellarific Friday post!


Thursday, 24 January 2013

Make It Crafty product spotlight

(Please scroll down for my MilkCoffee show case post!)


Hello, I'm back again with my Make It Crafty product spotlight using the Mini Book Style Box Kit...


I started off by painting the chipboard with Gesso and then glued on papers from the K & Company Small Wonders pad.  I also added some soft pink ink to the accessory chipboards and topped it off with some paper flowers.  I'm really pleased with how this turned out!   I created this for my friend who's baby girl is due very soon.  I'm going to fill it with some matching little socks, gloves and hat - I can't wait to give it to her!

MiC products used:


I hope you like my project.  Thanks for visiting and I'll see you tomorrow with my Bellarific Friday post!


Monday, 21 January 2013

Ice cream baby!

Happy Monday!  I'm here today with my Make It Crafty DT inspiration post.   This week the team are creating projects with the theme of summer so here is my make using Frenchie Claudine...


I just love this little cutie!  I used papers from Zoe Pearn's That's My Girl collection and added some more sweetness with those lickle buttons.   I wish it was summer in the UK already - the recent snow here makes me want to emigrate to Australia where they are enjoying their summer right now!

MiC products used:


Copics used:
Skin: E21, E00, E000
Hair: E50, E53, E57
Eyes: G000, G12, G82
Outfit: G000, G12, G82, RV00, RV21, RV23, C1, C3
Ice cream: E31, E33, E35, YR00, YR01, YR02, R32, R35, R37, C1, C3, G000, G12


 Okay, I am off now but I will see you later with my Lil' Inker Designs new release hop post!


Friday, 11 January 2013

Make It Crafty Inspiration blog hop!

(Please scroll down for my Bellarific Friday DT post!)


It's time for the fortnightly Make It Crafty Inspiration blog hop!  And for this hop the theme is "new beginnings".  What a great excuse to make another baby card - one of my friends of family always seem to be giving birth!!  Here it is...


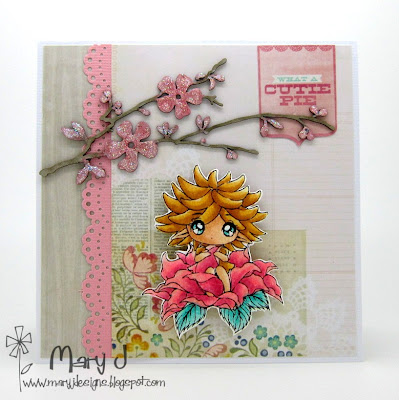
Isn't she the cutest?!  This is Bobo Petal Sprite who I matched up with My Minds Eye The Sweetest Thing Lavender papers.  To create a bit of depth, I popped this sweetie onto foam pads and also used one of the branches from the chipboard Oriental Bird set.  I inked up the flowers with a soft pink ink layered over with a white pigment ink, then dotted on some Stickles Star Dust (one of the pressies from my Secret Santa package from fabby team mate Sandie!).

I stamped coloured little Bobo Petal Sprite onto watercolour paper and then coloured in with my Copics - it gives a lovely texture to the image but boy does it drink the ink!  Needless to say I don't do this often!  Here's a close up...


Copics used:
Skin: E21, E00, E000
Hai: YR30, YR31, YR23
Eyes: BG10, BG15
Rose and leaves: G000, G12, G82, RV00, RV21, RV23
 

Back to the hop.  Comment a long the way to increase your chances of winning one of three hidden $5 gift certificates!  You should have got here from Rhea and you now need to hop off to Aeryn.  Here's the full hop list in case you get lost!


Mary J (me!)


Okay, I am off now and back tomorrow with my Whimsie Doodles DT post!


Saturday, 22 December 2012

Make It Crafty Christmas Event!

There's only 3 days til Christmas!


It's Day 22 of the Make It Crafty Christmas countdown and it's my turn today to share my DT inspiration project for it!

But before I get onto my project, a bit about the countdown!  The MiC gang and our Special Guests thought it would be fun to have a 'grown up' advent calendar as we count down the days til Christmas full of inspiration just for us creative minds!  Each day a sneak peek will be revealed on the MiC store blog with a link for you to follow "to open the door".  All you have to do is stop by the store blog each day to open the next door!


PLUS Zoe has Christmas Candy full of lots of crafty goodies that you don't want to miss out on!


AND THERE'S MORE GIFTS

But what's even more exciting is that you will have a chance to win the Make it Crafty goodies that I have played with today!!

By leaving a comment on this post you could win...


The comments will stay open until the 31st of December and the winners will be announced in the New Year on the MiC store blog. You can join us for all 24 days - giving you 24 chances to win some MiC goodies! If you join us late, simply go back to the start and catch up!

This is what I have created with the The Fairyland digi collection - my very first stepper card! 


I used Frances Burne's (of StampOwl's Studio fame) stepper card tutorial on Splitcoaststampers although I adapted it as I wanted the centre to be wider to fit my image.  I used papers from the My Mind's Eye Sweetest Thing Tangerine collection and the Lil' Inker Designs square stitched mat die on the matting. And do you love those leaves and teeny tiny butterflies?  They are from the Round Leaves set and I just added some punched flowers with flat backed pearls for the centres.  Here's a closer look...


Copics used:
Log - E31, E33, E35, E37
Plants and hats - G20, G43, G46, G28
Toadstools - E50, E53, R00, R12, R08
Hair - E50, E53, E57, E33, E37
Skin - E000, E00, E21


Don't forget to leave a comment to this post before December 31st and stop by the Make it Crafty Store blog to 'open the door' to 24 other inspirational projects!


Friday, 30 November 2012

Choccie holder!

I'm here with another make using more fabulous goodies from the fab Quixotic Paperie store!  So for my DT make today, I have made a Christmas decoration that I am going to store my all time favourite Lindt chocolates in...


I used the new Make It Crafty Santa Sleigh 3D Kit lasercut chipboard.  I trimmed up one of the Christmas Borders lasercut chipboard and glued some Delicate Snowflakes onto the reindeer.  I had so much fun making this!  First I prepped the chipboard by painting it with Gesso then I inked up the edges with some Brilliance blue ink and then added loads (and I mean loads!) of Stickles Icicles glue.  You can just about see in the photos that I also stuck on some snow white Flowersoft along the bottom.  

Now I've got to hide the choccies before I eat them all before Christmas!


Thursday, 22 November 2012

Have a dog-gone Merry Christmas!

(Please scroll down for my MilkCoffee DT post!)


I'm here with my Whimsie Doodles DT make using Winter Dog and the Dog House card shape...


I just love this cute dog!!  I used Echo Park This and That Christmas papers.  I inked up and added Stickles glitter glue to a Make It Crafty Holly Decoration chipboard and of course topped it off with some organza ribbon.

Thanks for visiting me today and see you tomorrow with my Bellarific Friday Babe post!


Saturday, 17 November 2012

Make It Crafty shabby chic style

Hello, I'm today with something a little different.  Instead of getting out my Copics to colour in the yummy Make It Crafty super cool stamps, today I wanted to showcase some of the gorgeous chipboard in store.  So without further ado, here is my make...


I just luuuurve Make It Crafty chipboard - it is so delicate and detailed, just stunning!  I covered the chipboard first with Colorbox pigment ink in Frost White (I find it's one of the best opaque inks out there) and then lightly dabbed Tsukineko Brilliance ink in Pearlescent Beige to subtly age it.  I used papers by Michele R Designs called Peony Garden and softly distressed the edges.

MiC goodies I used:


I hope you like my shabby chic card!  See you later with my Kraftin' Kimmie guest designer card!


Wednesday, 14 November 2012

I made it on the Make It Crafty design team!

(Please scroll down for my Lil' Inker Designs blog hop post!)


Yes, very exciting news for me!  When the uber cool Zoe invited me to join her talented Make It Crafty Inspiration design team it took me all of a split second to accept it!  So this is my very first make for Make It Crafty and I thought I'd plunge in and make a Christmas card.  So here it is using sweet newbie Fairy Tinsel...


Ain't she sweet?!  I wanted to showcase this cutie so I only added a little bit of pattern (Happy Holidays by Zoe Pearn) but created some interest with an embossed background (using the Cuttlebug snowflake embossing folder).  I also used the new Christmas Borders chipboard to frame her - I simply trimmed one of the borders and then inked it up with a matching pigment ink.  And do you like the berries?!  I used a Viva Decor Pearl pen to give it 3D shape and then sprinkled on lots of Doodlebug Cupcake glitter - I'm really pleased with the way the berries turned out, they literally pop off the card!

And of course where would our sweet Fairy Tinsel be without her tinsel?  I shaded the tinsel with my Copic C1 and C3 and then used Glamour Dust on top.  I love Glamour Dust as it's so light the colouring still shows through!  Here's a closer look so you can see what I mean...


Copics:
Holly leaves and trousers - BG10, BG15
Coat - RV00, RV52, RV55, RV25
Hair - E31, E33, E35, E37

Okay, that's it from me - I hope you have enjoyed my very first Make It Crafty DT post!


Saturday, 13 October 2012

Even big girls need bedtime stories!

Hi there - it's Mary J here to show you a card I made using Susana Loves Stamps one of the new recent releases available in the Quixotic Paperie store...


Isn't she beautiful?  This is Courageous Eyes who I stamped on to my favourite Make It Colour Blending Card and coloured in with my Copic Markers.  For interest I used Make It Crafty Butterfly Leaves and Fancy Ribbon Sliders laser cut chipboard and also the flourish die cut using my MFT Die-Namics Vintage Flourish

I coloured the elements in using a combination of Tim Holtz Distress Markers in Crushed Olive, Worn Lipstick and Black Soot.  I also used these pens to colour the seam binding ribbon and scrunched it up for more texture.  If you look carefully, you can just about see in the photo below that I gave the elements some sheen by colouring on and then rubbing in Sakura Gelly Roll Clear Stardust Pen...


I hope you all have a great weekend planned.  Today I will be swimming in dolphins so I know I'll be having a great time!  ttfn!


*** Latest Arrivals ***

Thursday, 27 September 2012

Spooky goings on over at Quixotic Paperie!

Boo!  I mean, hello!  Here today to show you my DT project that I posted earlier in the week over at Quixotic Inspirations for our of Halloween inspiration of spooky stash at Quixotic Paperie!  So, today I am showing you what I did with the Make It Crafty Shadow Box Circle Frame kit...


This was so much fun to make!  I am going to put it on a shelf in my porch on Halloween night to welcome those little ones coming round trick or treating!!  Okay, so what did it take to make this?  Ain't that scarey gal a lot of fun?!  This is Kraftin' Kimmie Stamps Mitzi the Mummy who I stamped on Make It Color Blending Card (my fave to use with my Copic markers!).

For the base, I used Black Soot Distress Ink and then I sprayed Ranger Adirondack Colour Wash Spray in Lettuce for a gooey sheen!  Paper-wise, I used the Echo Park Chillingsworth Manor pad and of course I used lots of My Favorite Things Die-Namics...


Okay, that is it from me today - I hope you liked my scarey project!  Don't forget to see this post here to be in for a chance to win the prize giveaway!!


I am entering my card into the following challenges:
 

LinkWithin

Blog Widget by LinkWithin